
On one of my recent visits to an electronics website I saw this voltage sensor, intrigued I bought it and wondered how it worked, there didn’t seem much to it.
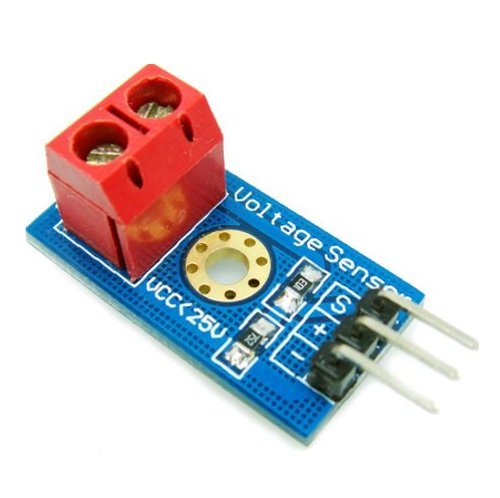
Voltage sensor
As a Chipkit Uno is limited to 3.3v maximum on its I/O lines I could see what was being attempted here, in fact you can quite easily build this circuit. This is simply a voltage divider with a 30k and 7k5 resistors. Basically its a 5:1 divider, so bearing in mind the 3.3v input limit, this circuit allows you to go up to 16v. You can punch these numbers into a voltage divider calculator, here you can see I’ve done this for you
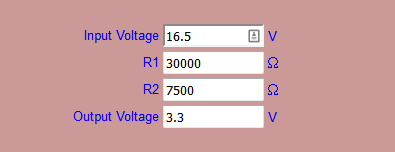
voltage divider 3v3
There are a couple of connections
Vcc and GND – This is your DC power source, watch the polarity as it shares a common ground with your Arduino
S: This connects to your Arduino analog input, we use A1 you can use another if you wish
–: This connects to your Arduino ground.
+: This is not used
Schematic
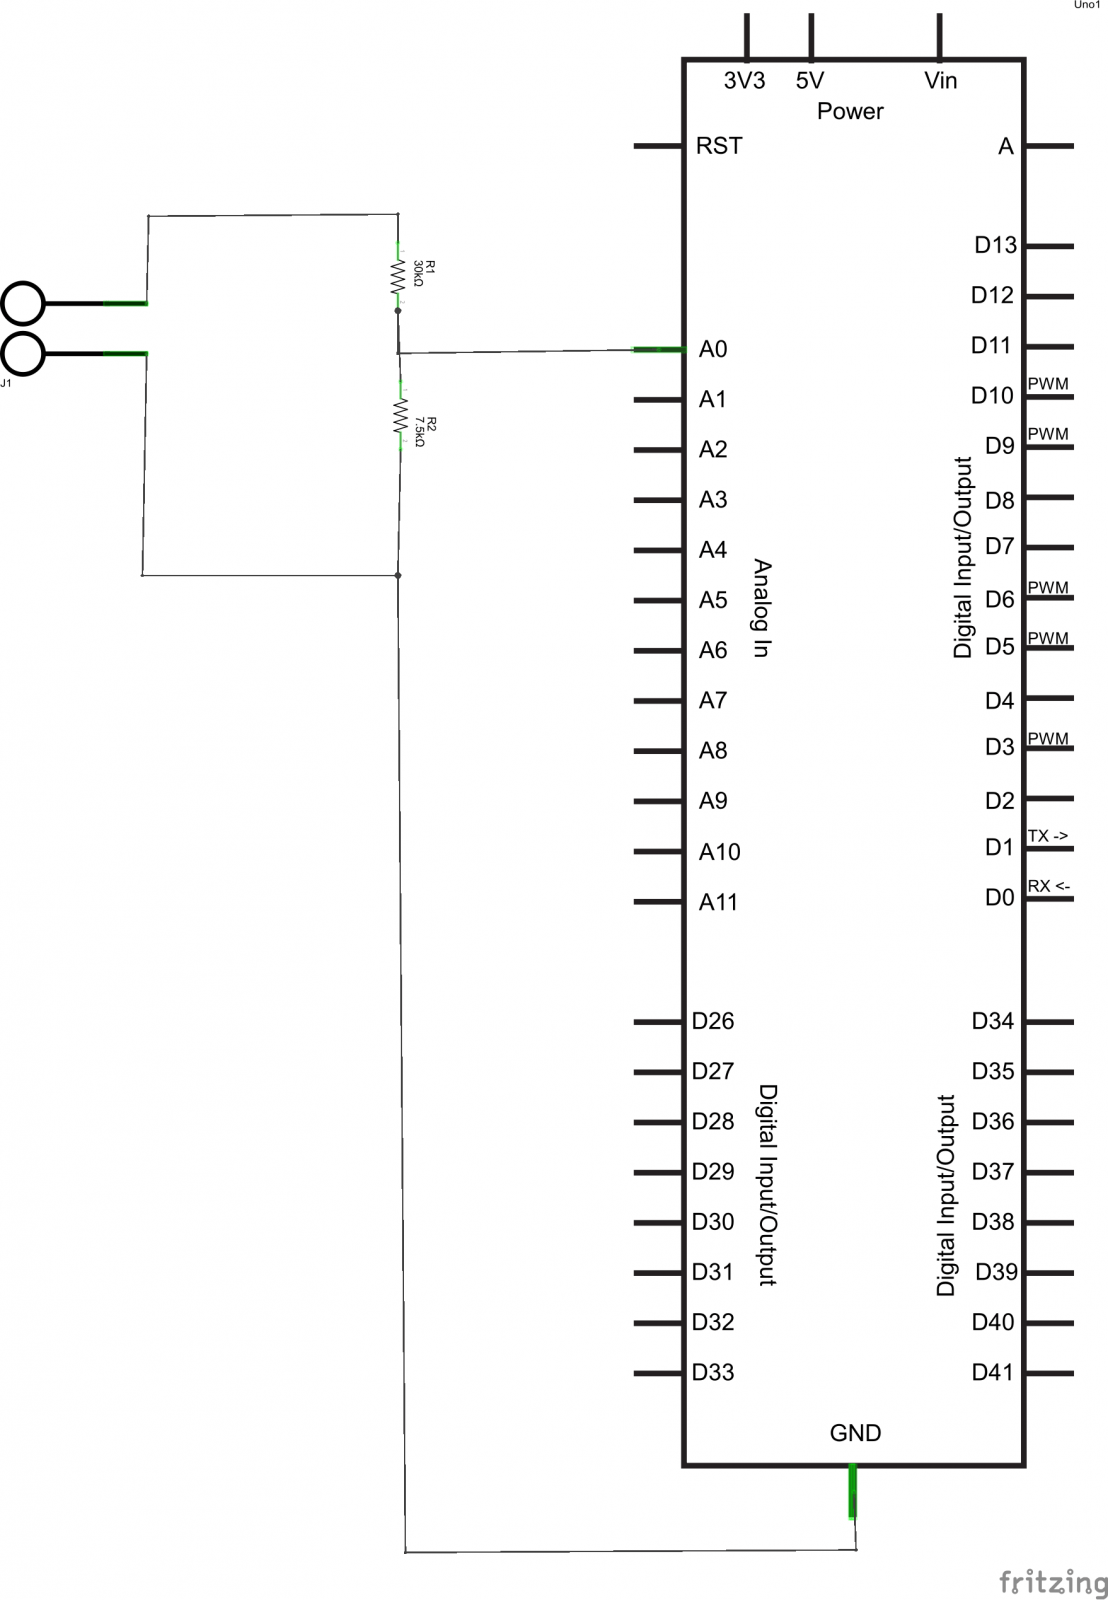
Chipkit Voltage sensor schematic
Code
[codesyntax lang=”cpp”]
int analogInput = A1; // I used A1

float vout = 0.0;
float vin = 0.0;
float R1 = 30000.0; //30k
float R2 = 7500.0; //7500 ohm resistor, I tweaked this
int value = 0;

void setup()
{
   pinMode(analogInput, INPUT);
   Serial.begin(9600);
   Serial.println("BASIC DC VOLTMETER");
}

void loop()
{
   // read the value at analog input
   value = analogRead(analogInput);
   vout = (value * 3.3) / 1024.0;
   vin = vout / (R2/(R1+R2));

  Serial.print("Voltage = ");
  Serial.println(vin,2);
  delay(500);
}
[/codesyntax]
