
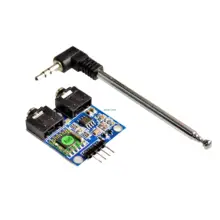
In this article we will create a simple radio using a TEA5767 module and a Chipkit Max32, the example is written in the Arduino IDE
The TEA5767HN is a single-chip electronically tuned FM stereo radio for low-voltage applications with fully integrated Intermediate Frequency (IF) selectivity and demodulation.
The radio is completely adjustment-free and only requires a minimum of small and low cost external components. The radio can be tuned to the European, US, and Japanese FM bands.
Features
■ High sensitivity due to integrated low-noise RF input amplifier
■ FM mixer for conversion to IF of the US/Europe (87.5 MHz to 108 MHz) and Japanese (76 MHz to 91 MHz) FM band
■ Preset tuning to receive Japanese TV audio up to 108 MHz
■ RF Automatic Gain Control (AGC) circuit
■ LC tuner oscillator operating with low cost fixed chip inductors
■ FM IF selectivity performed internally
■ No external discriminator needed due to fully integrated FM demodulator
■ Crystal reference frequency oscillator; the oscillator operates with a 32.768 kHz clock crystal or with a 13 MHz crystal and with an externally applied 6.5 MHz reference frequency
■ Phase-locked loop (PLL) synthesizer tuning system
■ I2C-bus and 3-wire bus, selectable via pin BUSMODE
■ 7-bit IF counter output via the bus
■ 4-bit level information output via the bus
■ Soft mute
■ Signal dependent mono to stereo blend [Stereo Noise Cancelling (SNC)]
■ Signal dependent High Cut Control (HCC)
■ Soft mute, SNC and HCC can be switched off via the bus
■ Adjustment-free stereo decoder
■ Autonomous search tuning function
■ Standby mode
■ Two software programmable ports
■ Bus enable line to switch the bus input and output lines into 3-state mode
Parts List
Schematic
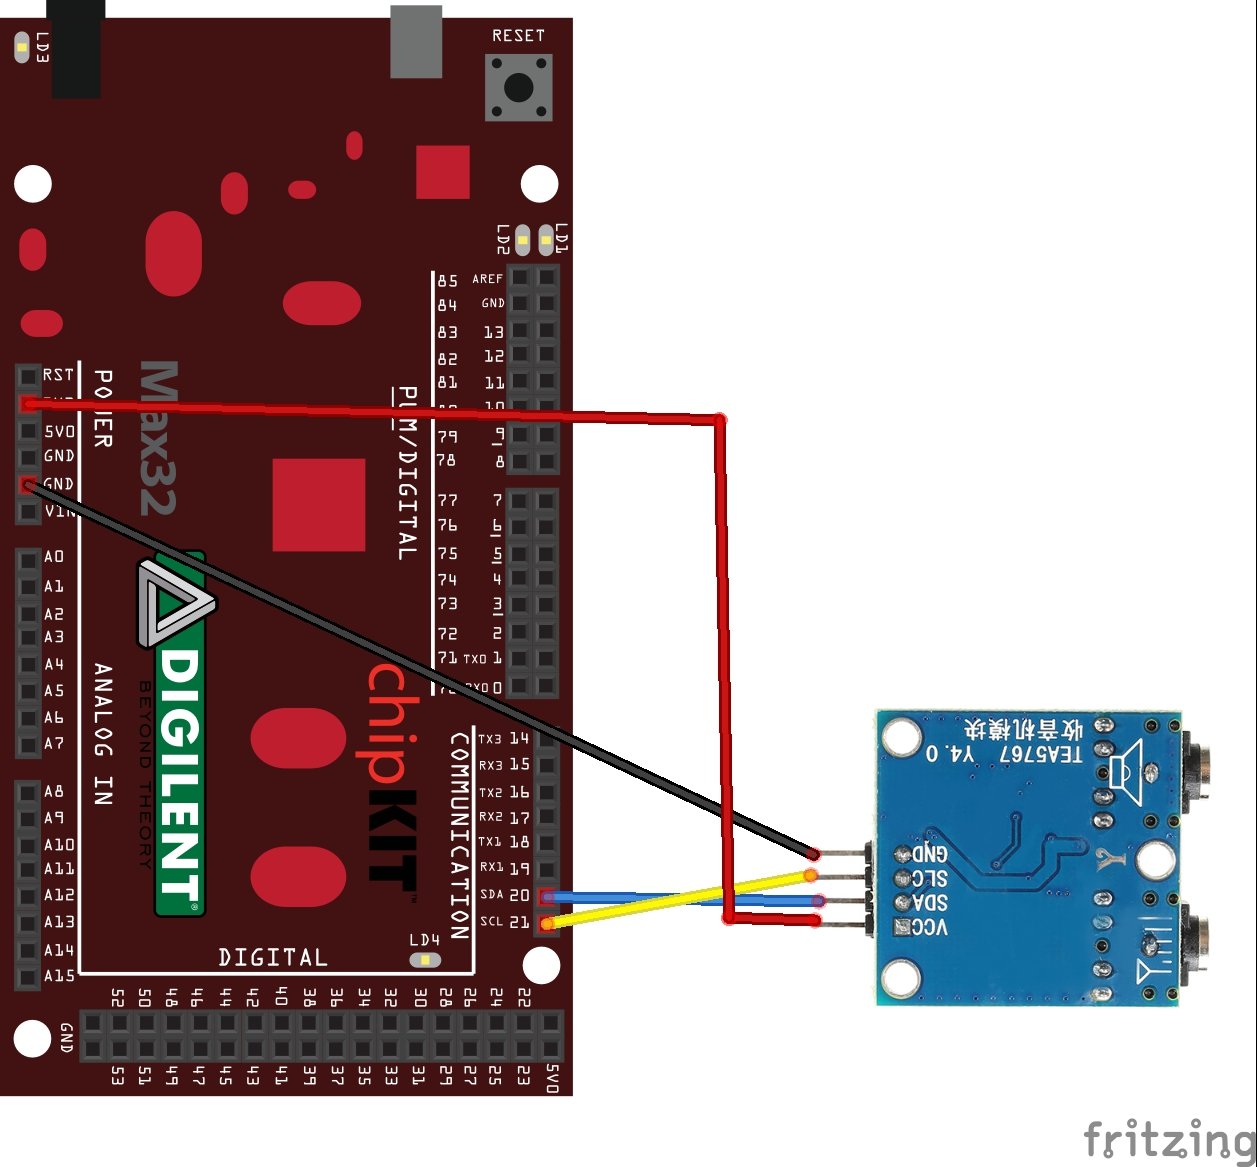
max32 and tea5767
Code
This uses the following library – https://github.com/big12boy/TEA5767
102.8 is a local radio station where I live, you may have to change this
[codesyntax lang=”cpp”]
#include <TEA5767.h>
TEA5767 radio = TEA5767();

float frequency = 102.8; //Enter your own Frequency
long baud = 250000; //Enter your own Baudrate

long lmillis = 0;

void setup() {
  //Setup Serial and I2C
  Serial.begin(baud);
  Wire.begin();

  //Set Frequency to start with
  radio.setFrequency(frequency);
}

void loop() {
  //Check for User Input
  if(Serial.available()){
    float frequency = Serial.parseFloat(); //Read Frequency from Serial
    radio.setFrequency(frequency); //Set Frequency
  }

  //Check for time (active every second
  if(lmillis <= millis()){
    lmillis = millis() + 1000; //Read current time and add 1 second

	//Print Stats to Serial Console
    printFrequency();
    printReady();
    printStereo();
    printSignalLevel();

    Serial.println();
  }
}

void printFrequency(){
  float frequency = radio.getFrequency(); //Get Frequency
  Serial.print("Frequency: ");
  Serial.println(frequency, 2);
}

void printReady(){
  int rdy = radio.getReady(); //Get State
  Serial.print("Ready: ");
  Serial.println(rdy);
}

void printStereo(){
  bool stereo = radio.isStereo(); //Get Stereo
  Serial.print("Stereo: ");
  Serial.println(stereo);
}

void printSignalLevel(){
  short level = radio.getSignalLevel(); //Get Signal Level
  Serial.print("Signal (0-15): ");
  Serial.println(level);
}
[/codesyntax]
Output
You will see the following in the serial monitor and if you have selected a radio station you should hear the station
Frequency: 102.80
Ready: 1
Stereo: 1
Signal (0-15): 11
Frequency: 102.80
Ready: 1
Stereo: 1
Signal (0-15): 11
