
Where I normally like to create development boards for microcontrollers on stripboard, sometimes there are ready made boards or kits available that simplify things. We will look at several of these that I have purchased and I will highlight features and other relevant information.
The first development board is from RKeducation and is designed for use with 18 pin PICs, I order mine from their ebay store and asked for a PIC16F819 to be included as this was not a PIC that I had at hand,
Here is a nice big image of the board
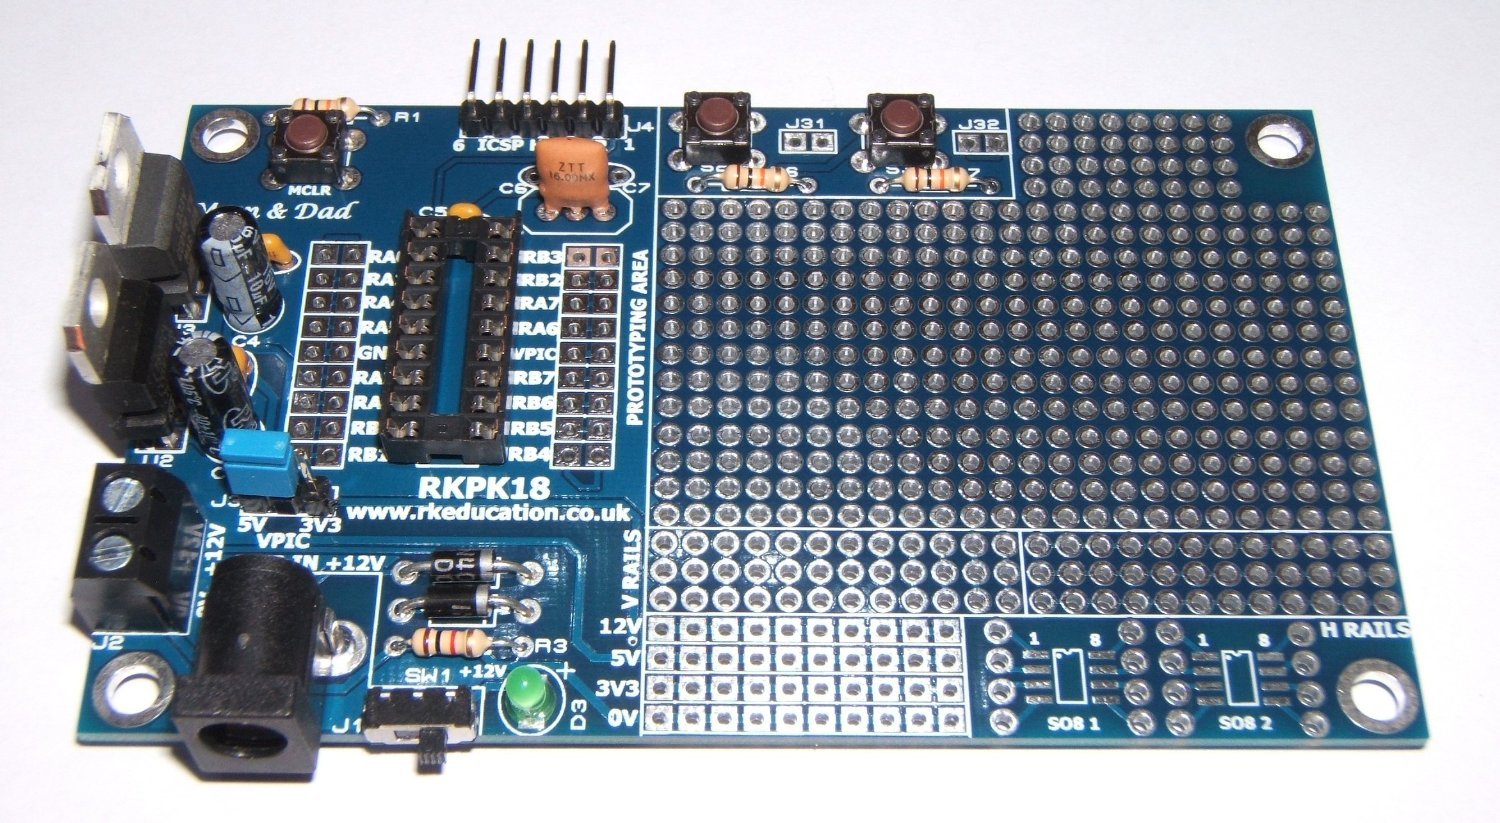
RKPK18
Features
A Low cost development board coming in at £6.99
Supports several PICs
Can be used with the Pickit programmers, I used a Pickit 3
Prototyping area on board
5v and 3.3v regulators on board
Through hole components – easier to hand solder
The build is fairly straightforward and only requires basic soldering skills. You can get the schematics and build instructions from their website at http://rkeducation.co.uk/ . The board is well laid out.
I connected a Pickit3 to the programming header and verified if I could read the device connected. You can see this in the screenshot below. The device read was correct

Pickit_16f819
An easy way of testing is to connect some LEDs to one of the ports and flash them on and off.
Code
This is a basic example which will simply toggle PORTA outputs high and low. this was written in MikroC for Pic. Its useful for testing your Pic is working correctly before going on to more complex examples
[codesyntax lang=”cpp”]
int main(void)
{
TRISA = 0x00; // Configure port A as output

while(1)
{
PORTA = 0x00;
delay_ms(1000); // Wait for 1s
PORTA = 0xFF;
delay_ms(1000); // Wait for 1s
}
}
[/codesyntax]
Links
http://rkeducation.co.uk/RK-Range-for-PICs.php
