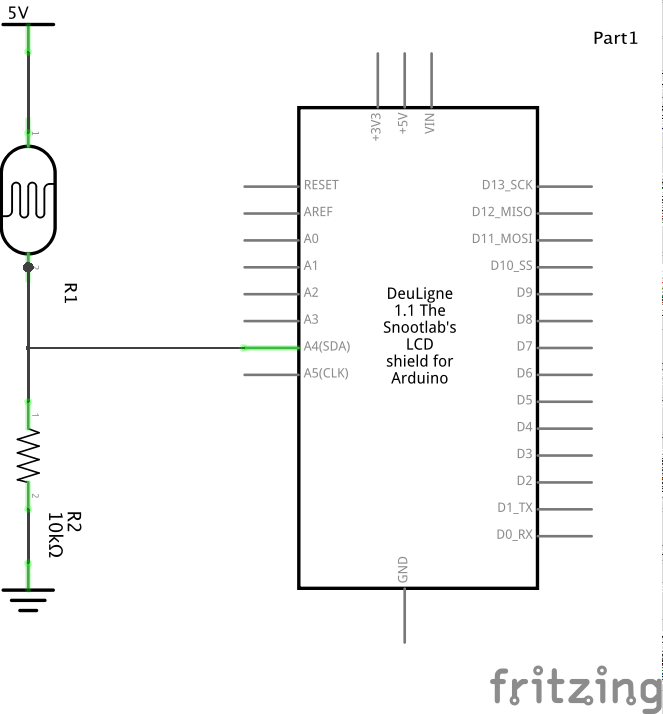
In this example we keep the LCD shield connected to our Chipkit UNO and this time we will connect an LDR to A4, read the value in and display it on the LCD display
I used an LDR breakout but its basically shown in the schematic below
Code
[codesyntax lang=”cpp”]
#include <LiquidCrystal.h>

const int analogInPin = A4;  // Analog input pin that the LDR is attached to
int sensorValue = 0;

// initialize the library with the numbers of the interface pins
LiquidCrystal lcd(8, 9, 4, 5, 6, 7);

void setup()
{
  // set up the LCD's number of columns and rows:
  lcd.begin(16, 2);
  // Print a message to the LCD.
  lcd.print("LDR reading!");
}

void loop()
{
  sensorValue = analogRead(analogInPin);
  // set the cursor to column 0, line 1
  lcd.setCursor(0, 1);
  delay(1000);
  // print the LDR reading
  lcd.print(sensorValue);
}
[/codesyntax]